
With more to come…
Yes, it has been a while since the last post. We have made some progress since then (cleaning up exhaust manifolds and fitting work on the driver’s side floor pan), but I was overwhelmed with work projects and business travel.
I finally got a couple of weeks off, so in these two weeks I’m working on the new floor pan installs and preparing for the body lift.
The first step in fitting the new driver’s side floor pan was to position the rear of the pan (and by extension the rear seat mounting nuts). After setting the pan height with a template that I made from the original pan’s mount locations, I drilled a couple of holes and threaded in some self tapping sheet metal screws.
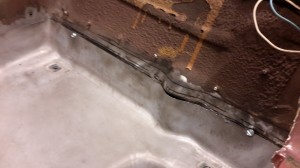
For fitting the sides and front of the floor pan, we secured the pan with sheet metal screws go the rear bulkhead (after aligning it with the rear template).
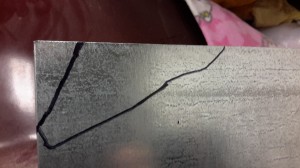
One of the issues we ran into was the new floor pan had a twist in the middle which resulted in the left front seat mount being 1.5 inches too low. It wasn’t simply a twist in the pan, as when we untwisted the pan the left front was now 3 inches too high. The only way to correct for this was make a relief cut near where the pan dips into the footwell.
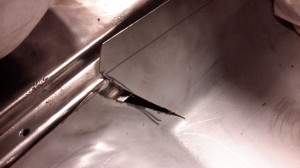
This is the relief cut that was needed to raise the front left seat mount by 1.5 inches.
After making the cut we needed to add in some replacement metal to fill the ‘V’ made by the relief cut. We used metal from the side trimming trimming to fill iit in.
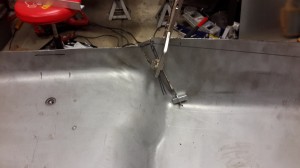
Adding in new sheet metal…
The left front of the pan was not long enough to make it to the fiberglass firewall, so we needed to add some metal to the front of the pan.
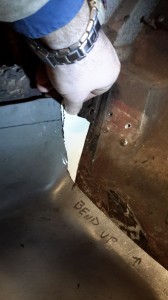
Making the template for the front left corner of the pan…
We started by making a paper template and then outlining it on to some 18ga stock and then cutting it out with tin snips and a 3 inch metal cutter.
Tracing out the new template in sheet metal.
after cutting and shaping, it’s ready for welding to the front of the pan.
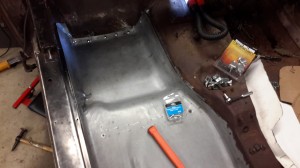
Trail fitting the new corner,
The trail fitting is getting close!
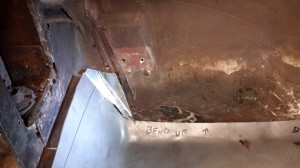
We’re getting close! We only need to weld in the new corner, drill out one rivet hole, and then begin the final installation. N.B. – Do not mount the rivets as shown in the photo; I was only using the rivets to position the floor pan. The rivet head has to be on the fiberglass side!
The only bits left in the pre-installation fitting is to do the final welding on the sheet metal extension, drilling out the rivet hole in the extension, and then making the final cuts along the drivetrain tunnel. We’re getting close!
A note of warning, we are using large flange rivets to attach the front of the floor pan to the fiberglass firewall. For the convenience of positioning the pan we inserted some 3/16ths 1/4 inch long wide flange rivets in from the sheet metal side, but the correct way is to have the large flange on the fiberglass side of the panel to help spread the load of the fastener. Do not mount the rivets as show above; that was done only to position the pan.
Come back soon…we’ll be welding in the driver’s side floor pan in the next day or so.