Transmission Progress!

We’re getting into gear…

We finally received the new low-reverse carrier and have re-started the transmission assembly.

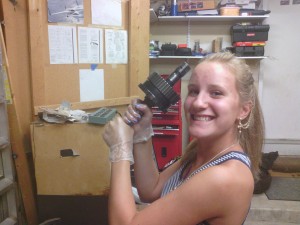
Jackie hoisting the output shaft, getting ready for installation into thw transmission case.

Jackie hoisting the output shaft, getting ready for installation into the transmission case.

First into the case was the output shaft, then the sprag and sun gear, followed by the low-reverse clutches (plates and frictions).

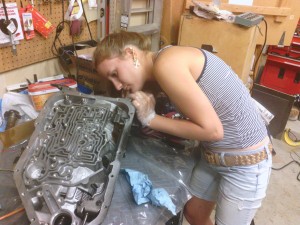
Jackie installing the low reverse clutch plates.

Jackie installing the low reverse clutch plates.

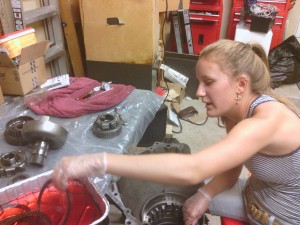
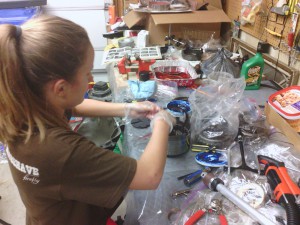
Jackie soaking the new clutch plates and frictions.

Jackie soaking the new clutch plates and frictions.

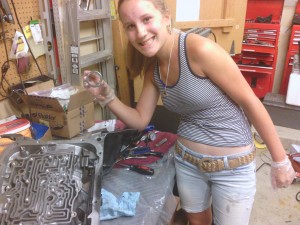
Jackie installing a new torrington bearing.

Jackie installing a new torrington bearing.

Next is the output shell, low-reverse carrier, ring gear, thurst bearing and spring clip.  We already test assembled this on the bench and achieved 0.008″ of end-play…almost perfect!

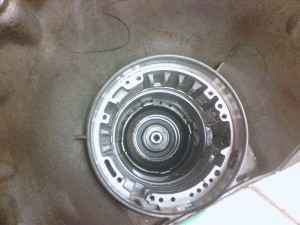
The output shaft, low reverse carrier, and sun gear shell installed.

The output shaft, low reverse carrier, and sun gear shell installed.

Next up was rebuilding the direct clutch…

Jackie rebuilding the direct clutch.  Here she is driving out one of the bushing with a brass drift punch, getting ready for new bearings.

Jackie rebuilding the direct clutch. Here she is driving out one of the bushing with a brass drift punch, getting ready for new bearings.

Jackie dropping in the new clutch frictions and steels.

Jackie dropping in the new clutch frictions and steels.

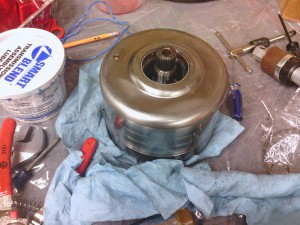
The freshly rebuilt direct clutch drum...

The freshly rebuilt direct clutch drum…

Now were ready to assemble the direct clutch into the transmission, but we’ve had another patient in the shop this week:

A temporary visitor to Cora's Garage...Jackie's Fiero was diagnosed with a bad fuel pump, so it was time to drop the tank and replace the in-tank fuel pump.

A temporary visitor to Cora’s Garage…Jackie’s Fiero was diagnosed with a bad fuel pump, so it was time to drop the tank and replace the in-tank fuel pump.

We should be able to finish up the fuel tank tomorrow night and then it will be back on to transmission work.

Stay tuned!

Opps! Our planets have too much gap…

With the Earth, that would be a good thing; with planetary gears…not so much!

One of the difficulties in rebuilding a transmission that has already been worked on by others, is that you run the chance of having an odd mix of components, depending on what kind of use the original (re)builder was planning.  In digging into our TH200-4R, we found a number of mixed components:

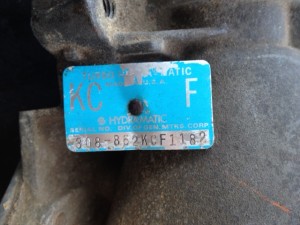
  • The transmission was marked with a KCF transmission tag (Olds 307ci Car)
  • The valve body was marked with an OZ code (Olds 442 Performance VB)
  • The governor was from a Buick Grand National (high performance!)
  • The servo was an intermediate size (orignal KCF piece?)
  • The front pump had 7 vanes (non-performance) instead or 10 or 13

KCF Tag

And during the rebuilding process, we ran into an odd mix of component wear patterns as well; the low-reverse planet carrier thrust washer was worn out, the forward clutch housing’s teeth were chewed up (hard shifts), but the band looked new (if somewhat cracked and of poor quality), the first planetary assembly had clearances that were practically brand new, and the bushings were in generally good shape.

So we took that all into account and we started assembling the output shaft:

Output Shaft Installed

And then we ran into this:

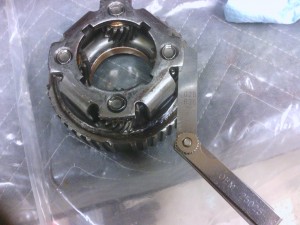
The tech manual says the end play for the Rear Planet Carrier is between 0.009" and 0.024".  I measured the end play at 0.025", so now I need to find a new carrier.

The tech manual says the end play for the Rear Planet Carrier is between 0.009″ and 0.024″. I measured the end play at 0.025″, so now I need to find a new carrier.

At 0.025 inches of bearing play, the rear planetary gear bushings were worn out and need to be replaced.  The problem is that this is a “non-rebuildable unit”, at least by home shop standards, and GM no longer makes this assembly.  So our best shot is used or re-manufactured.  We did find a re-manufactured unit but I won’t know what it’s end-play is until the unit arrives sometime this week.  I ordered it anyway, so we’ll see what turns up.

The output shaft is installed, but we have to wait on a new Rear Planet Carrier.

The output shaft is installed, but we have to wait on a new Rear Planet Carrier.

So…step by step.  At least I got the torque convertor ordered.

Bits of Faith

Have you ever been through something and you feel like you’ll never make it out? If you have, then I know how you feel. I’m close to halfway through rebuilding an automatic transmission and I’m telling you, it’s a real doozy, but that’s not what this post is about. This post is different. It’s special.

Sometimes, my life can be like rebuilding an automatic transmission. So many gears, so many things that could go wrong, and you have to have every little bit in the right order for it to work right. Some people’s problems are more difficult than others, and others are easier……like mine. Honestly, the one thing that keeps me working on the trans is the fact that in the end, it’ll all turn out right somehow.
Unfortunately, some don’t have that hope. Some don’t have that perseverance to keep moving forward. Here’s what this loud mouthin’, car lovin’, dream filled sixteen year old girl has to say to that. First off, I don’t go it alone-nor do you have to. I know that this sounds crazy or weird or religious or something, but God has stuck with me this whole time.
I was a broken mess, but he gave me hand and helped me up even though I sure as heck didn’t deserve it. How I got to have him with me you ask? It’s simple, just ask him. Ask him to come into your heart, forgive the wrongs you’ve done, ’cause we’ve all done ‘em, and He will change your life forever.
You’ll never be alone ever again. Even though I keep screwing up, God still sticks with me through the thick and thin. He’ll never abandon or forsake me even if I do so to Him. He said so in His Word(the Bible). He is a God of love, mercy, kindness, and grace. Even though there are so many unsureties in this life, the one thing that I will always be sure of is that God is there for me.
Who are you? Do you feel like you’ve screwed up your life seventy times over and you don’t feel you deserve a second chance? Do you feel alone? Do you feel like nobody cares about you? Sorry, but you’re as wrong as heck. God is the God of second chances. God is the God of an everlasting friendship with you. God has, does, and always will care for you. You are treasured.
Let’s face it, you were designed and created by the Best, and He thinks you’re awesome!! God has done His part now, will you do yours? He’s holding out His hand….but will you take it? You don’t have to be alone,and you don’t have to be heartbroken, you don’t have to feel guilt and sadness from things you’ve done in the past.
Sometimes, life is like an automatic transmission rebuild……it feels like you’ll never make it out, but with the right help and guidance……you’ll make after all. These were bits of faith from an eccentric sixteen year old girl with dreams as big as her appetite. Now with my best friend up-stairs…..I’m gonna go follow them. =]
I’m sorry that this post was pretty off-topic, but I guess every now and then…..some folks need to hear these words, so why not God use me to give the words to ‘em? Thanks for taking the time to read this. With the help of a great father and my Heavenly Friend, not every teenage girl gets to restore a ‘Vette, but I do! -Jackie

Transmission Update

Update: Not the same thing as an Upshift…

It’s been awhile, and progress has been slow since we have been concentrating on peripheral issues (that will help us on the project in the long run) while trying to get ready for the big stuff.

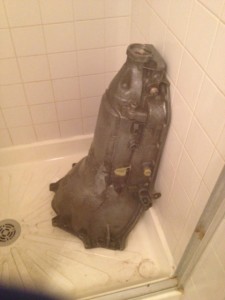
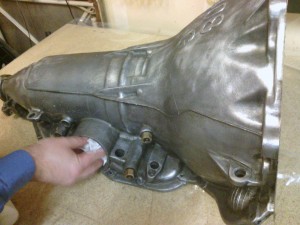
One of the items we did complete was the cleaning and painting of the 200-4R transmission case.  After the case was torn down and the worst of the dirt was cleaned off, we took it into the downstairs shower for a hard scrubbing and de-greasing.

Cleaning the Transmission case; with the support of my very understanding wife!  We used a solution of Simple Green with nylon brushes.  Since this unit had been sitting outside a number of years, we also had to use brass-wire brushes in a drill to deal with some surface white-powder corrosion issues.

Cleaning the Transmission case; with the support of my very understanding wife! We used a solution of Simple Green with nylon brushes. Since this unit had been sitting outside a number of years, we also had to use brass-wire brushes in a drill to deal with some surface white-powder corrosion issues.

After the shower (yes, I have a VERY understanding wife!), we started cleaning off some surface corrosion with brass wire brushes and a fiberglass abrasive cup in a 3/8″ drill.  Be careful when using abrasives near the Transmission Pan or pump mating surfaces, as deep scratches here could cause leaks or pressure loss and failure later on.

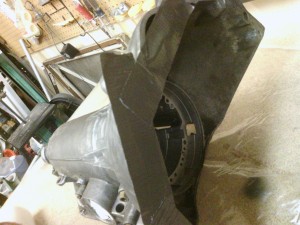
After all the cleaning is done, we sprayed the case in Brake Cleaner (which is good for stripping oils and residues off of metal surfaces prior to painting), and then began protecting the ports and mating surfaces from over-spray.

Prepping for paint by masking off the servo port.

Prepping for paint by masking off the servo port.

Here we are taping up the flanges to avoid over-spray.  This is more critical on the pan and valve body surfaces than the engine mounting flange shown here.

Here we are taping up the flanges to avoid over-spray. This is more critical on the pan and valve body surfaces than the engine mounting flange shown here.

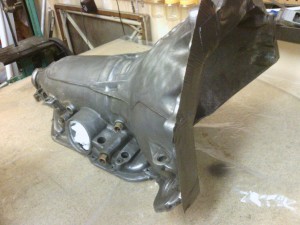
The 200-4R transmission case, ready to be sprayed.

The 200-4R transmission case, ready to be sprayed.

Now it was time to spray.  Since this was a non-original transmission, we elected to go with a non-original color (gloss engine black).

After cleaning with brake cleaner, and drying, we started spraying with high temperature, high gloss engine paint.  This paint is rated to 500F and it should hold up well.

After cleaning with brake cleaner, and drying, we started spraying with high temperature, high gloss engine paint. This paint is rated to 500F and it should hold up well.

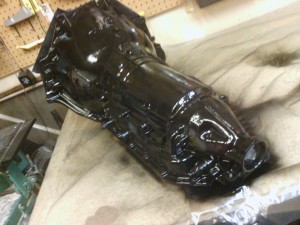
After drying, all looks good!  We’re now ready to start re-assembly of the case.

The transmission case...dry and ready for re-assembly.

The transmission case…dry and ready for re-assembly.

MEGA UPDATE!! (Trans Update, ‘Vette Paper, ‘Vette Themed Sweet 16, and MORE!)

Howdy guys! I need to begin with saying sorry for not updating! School has been busy and my dad has been on a ton of business trips the past few months so we haven’t had a huge amount of time to make some progress on the trans.

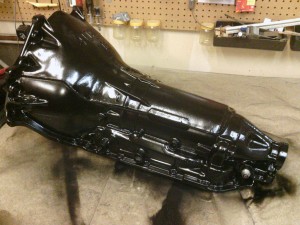
I’ll start off with the progress on the trans. My dad and I gutted the trans over Christmas break and gave it a new look. One word: Black! Yup, my dad and I painted it black. Our trans is officially now the most beautiful trans in the whole world-no question about it! =] Here’s what it now looks like:

Now giving the trans a new look is not the only thing we have done since the last update. We have also gotten around half-way through rebuilding the trans’ front pump.

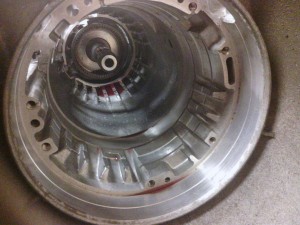
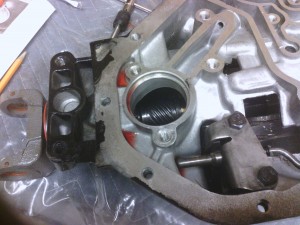
Front Pump

Front Pump

A little while back, I also made a video on the basics of of planning an automatic transmission rebuild and stuff like that. Check it out on my Youtube channel here: (Sorry about the poor quality)


For a writing class, I had to write a paper, and I wrote it about a ‘Vette. I figured that since it is ‘Vette related, why not post it on the blog? Well here it is, but be warned that it is definitely not my best work.

Beautiful in Red

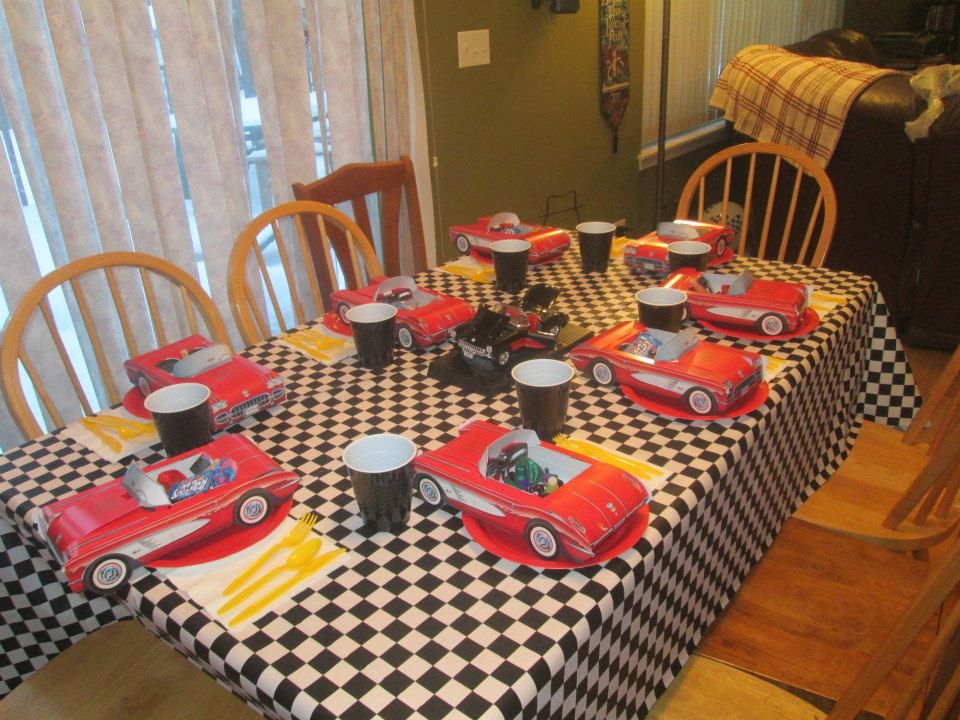
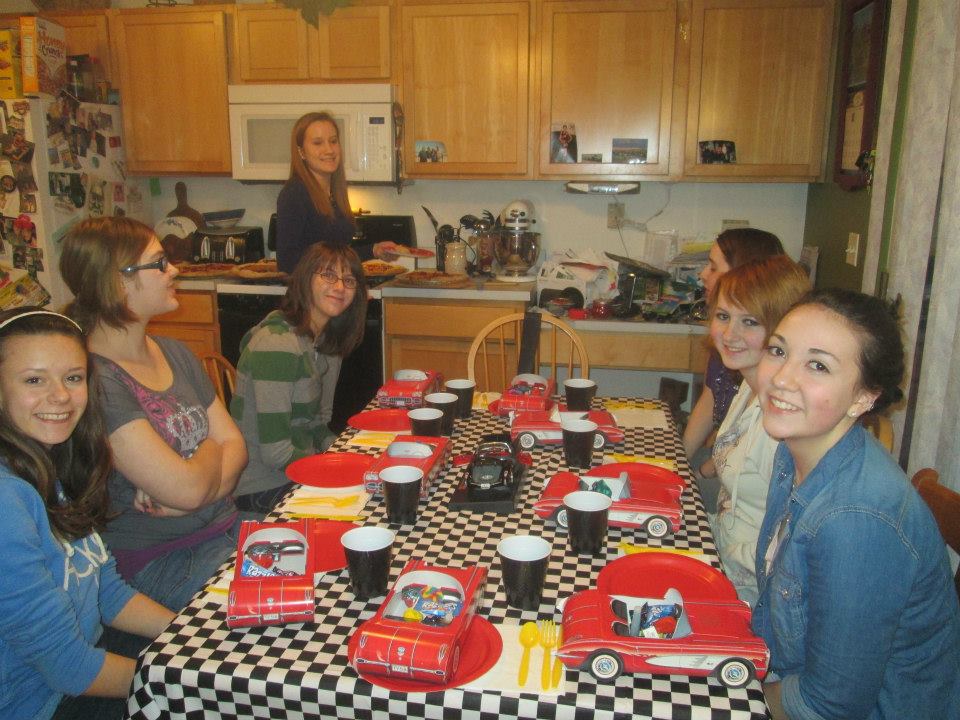
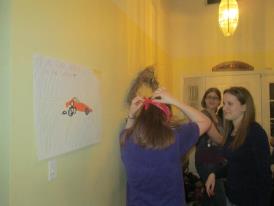
A few weeks back, I had my Sweet Sixteen Birthday Party, and of coarse, it was Corvette/Classic Car themed! I had some of my girl-friends over and had an awesome time! We played games such as Musical Parking spaces, Pin the ‘spare on the ‘Vette, and Balloon racers, which kinda failed lol. Most of the girls spent the night and it was an all out awesome birthday!! =]

Vette party 1

Vette party 2

Vette party 3

Last but not least-lets talk some C7!!! Some looked at the new Corvette model and fell in love, some looked at it and began to feel sick and later stated that the new model was a disgrace, and some liked it-but then they glanced at the tail-lights(like me). But I wish to know your guys’ opinions on the new design. If there was anything about the C7 that you would change, what would it be and/or why. And if you had the money to by the C7-would you buy it, or would you pass it up and spend your money elsewhere and why?

C7 Vette 1 C7 Vette 2

Thank you guys for tuning in on this post in Cora’s garage! I could use all the support I can get! And comment and share with friends- ’cause not every teenage girl gets to restore a ‘Vette! Thanks Again! =]

~Jackie

Dad and Me

“We’re Still Here!”

Starting the 200R4 teardown getting it ready for a rebuild.

The 200R4 with the valve body and 2-3 servo removed.

To start off, I should probably explain why there have not been any new posts lately; it’s because my dad has been having a butt-load of business trips and we just haven’t had the time. But we’ve been getting back on track. About a month ago, my dad bought a used(needs a rebuild) but more fuel-efficient trans for Cora. Two weeks ago, my dad and I began taking it apart. And I must add that I have never seen so much trans fluid in my life! It was was a lot more messy than I thought it would be! But there’s no objection to the fact that it was a lot of fun!! I’m not gonna go through the steps in this post, but in a future post so bear with me there. Any questions and I’m happy to answer! Have an awesome day! Sorry this was short! There will be more updates soon! ~Jackie W.

“Meeting the Entertaining People Who Love Corvettes and Food”

Last Tuesday night, I had the capitol privilege of meeting a large group of wonderful people who loved Corvettes and food, known as the “Fox Valley Corvette Club”. To provide an image of how we came to find this great club, my dad and I were visiting “Bloomington Gold” (A Corvette show) last month. We were looking for some parts for Cora when we came across a stand that the club had. We talked and picked up some pamphlets. Here we are now.

A few of the things which the club made very clear to us are the following: They are very welcoming to newcomers, and they like to eat. (lol) We ran into a ton of very fine people and very much enjoyed getting to meet them. My family is planning on joining the club after we attend another event. But until then, thank you, Fox Valley Corvette Club for welcoming my family so enthusiastically. We had a wonderful time! =]

The Fox Valley Corvette Club

Biography of ‘Vette

Those who ignore history are destined to live happy lives (or something like that…)

From when I owned Cora before, I knew some of the car’s history, just by having to work on it.  But some of it I had to research.  Unlike a lot of other marques, Corvettes can be somewhat unique, car to car.  This is partly due to the small volume runs (in comparison to other GM models), the isolated design team for Corvettes (at least in the 70’s), and the tendency for Rolling Model Changes (RMC’s) to occur on the assembly line anytime during a given model year.

For example, in Cora’s case, I knew from periodic maintenance that something strange was going on with the upper and lower radiator hoses (Cora’s original radiator used a “1977” upper radiator hose and a “1976” lower radiator hose).

In 1976, GM only expected to make 35,000 Corvettes, but when dealers ran out of Corvettes 2/3rd’s of the way into the year, it was obvious that GM would have to expand the production volume for the ’76 model (in the end, 46,558 1976 Corvettes were made).  The problem was that the factory and design teams were in the process of switching over to the ’77 model that had several design change differences with the ’76 model. Cora’s production date and serial number are a little over 10 cars into this “new” ’76 model production run.

A little aside is necessary here; when an OEM (such as GM) builds a car, they depend on a number of Tier-1 manufacturers to supply the necessary parts.  Generally, apart from the chassis (fiberglass and frame), engine, and transmission, the rest of the parts come from Tier-1’s and GM assembles them into a final car.  So to meet the OEM’s delivery dates (and avoid an assembly line going down due to lack of parts), the OEM schedules these part deliveries with the Tier-1’s several months in advance (this includes new parts that might be going into a new model year).

So, the scenario here is that the assembly line was getting ready to make the ’77 model Corvette when suddenly the order comes from above that they need to continue making more of the ’76 model (11,000 more as it turned out).  But the Tier-1 parts suppliers had already geared up to supply the ’77 model parts (where they were different) and did not have production scheduled for ’76 model parts.

So how did they handle this situation?  I think the assembly line started being creative.  When the 1976 parts ran out, they started using 1977 parts (where they fit without any issues).  When the parts did not directly fit, they hand modified some of them to make them fit. Other part changes they were managing during the change-over were:

  • A “Pancake A/C Compressor” was introduced
    (Cora has the Early Long A6 A/C Compressor)
  • The Rear Bumper Corvette Trim was changed from 6″ to 8″
    (Cora has the Late 8″ Emblem)
  • Interior Components were changed – larger Radio, T-Top brace Dome Light added
    (Cora has the Early Interior without the Dome Light and larger Radio)

So in the case of Cora’s radiator hoses, I think they modified the upper radiator outlet to work with the 1977 upper radiator hoses that they had plenty of.  It took me a number of trips to the auto parts store to get this scenario worked out.  I kept coming home with matched sets of hoses, one set for ’76 (where the upper hose wouldn’t fit) and then one set for ’77 (where the lower hose wouldn’t fit).

Nowadays, the auto parts vendors do recognize that there are some part differences between “Early” ’76 and “Late” ’76, but even then there are problems.  The “Late” ’76 radiators and hoses are really just the ’77 configuration (i.e. not a mix of ’76 and ’77 hoses on the same car).  It seems Cora was somewhat unique in this regard.  As for how many ’76 Corvettes are like Cora (with different upper and lower hoses), I have no idea.  Perhaps some other ‘Vette owners can chime in here…do you have a ’76 serial number 35,0xx car with different upper and lower hoses?  I’d like to know…leave a comment.

First Steps…

Starting small….

On a big project (such as Cora’s restoration) sometimes you have to do some little jobs that have immediate payoff.  This can help give you much needed satisfaction and closure.  When we bought Cora back, one of the things we wanted to change (or put right) was the engine compartment chrome dress-up items.  A lot of home mechanics will put such items on vehicles to have it look “flashy” under the hood and say “look at me!”  But when Jackie and I discussed this, we both felt we should have Cora look as original as possible, so the dress-up items had to go.

As a result, we started looking for an original air cleaner, a set of valve covers and an alternator bracket at the Bloomington Gold Corvette Show this weekend.  We did score a set of valve covers (for $30!), a Stingray badge for the right fender ($5) and a thermostat housing ($5), but no air cleaner or alternator bracket.  In talking to some of the vendors at the show, it seems that the single-snorkle L-48 air cleaner from the mid-70’s is the most difficult air-cleaner to find now days (plenty of dual-snorkles were at the show though).  It seems so many people threw these away that it is hard to find originals anymore.  Looking at ebay showed prices of $250 for a beat up unit and $400 for an in-box NOS (New-Old-Stock) part, all of which was a bit pricey.  We did get a lead at the show that I’ll follow up a little later (I need to give the vendor some time to get back home first and check his inventory).  Otherwise, we can wait for a deal to pop up on this item…we have time.

Now back to baby steps.  While we wait to really dig into the project (I have a bathroom remodel and a little ‘glassing to do on the airplane project first), we thought we would do a quick valve cover transplant to at least get that part of the engine bay back to original specs.  We didn’t repaint the valve covers, since we will be pulling the engine and rebuilding it in a couple of months or so and at that time we will do a complete cleaning and re-spray in “Chevy Engine Orange”.

To start (in prepping the patient) we first removed the air cleaner to have better access to the valve covers…
Prepped and ready for “Valve Cover Transplant”

The blue towel is to protect the open carburetor from falling debris.  Jackie then started on the driver’s side valve cover while I worked on the passenger’s side cover.
Jackie dives in to remove the driver-side valve cover

Only four bolts hold each valve cover on, so getting the cover off is relatively quick.  The only nuisance was that a stud kit was installed and the studs had corroded and were a little difficult to remove from the heads.
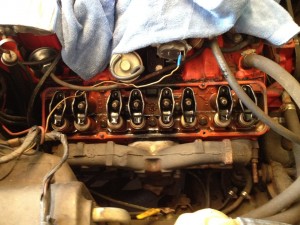
The passenger-side valve train looks good!

After the studs were removed, I inspected the valve train.  I was looking for signs of bad lifters (i.e. no oil on the rocker arms, or excessive side play.  The heads were rebuilt around 80,000 miles so I didn’t expect to find much wear (the car now has 116,000 miles on it), and I was pleased to see that no wear was evident.  We will inspect the heads more when we rebuild the engine over the winter.  For now, all looked good.

Passenger-side OEM cover installed

After a little clean up, the original style valve cover was installed and bolted into place.
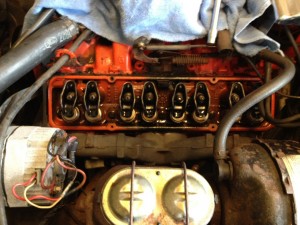
Driver-side valve train…also looks good

The driver’s side valve train also shows a lack of wear with oil evident on each of the rocker arms (this shows that the lifters are distributing oil to each of the rocker arms correctly).  In other words, it’s all good!
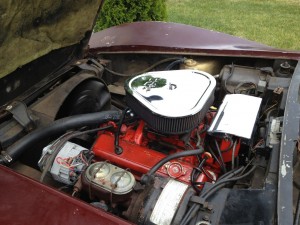
Operation completed and running

Now with the new OEM style valve covers installed, we are a step closer to getting the engine compartment back to OEM specs.  Next up…finding an OEM air cleaner.

By the way (in case you’re curious), the chrome rectangular cover at the rear of the engine bay is stock and was meant to shield the AM/FM radio from ignition system noise (caused by the high voltage ignition sparks) since the Corvette’s fiberglass body and firewall do not block ignition noise at all.  There are also supposed to be side covers for the ignition wires to run in, but those are missing too (more parts to buy at a later date).